

 Spanish
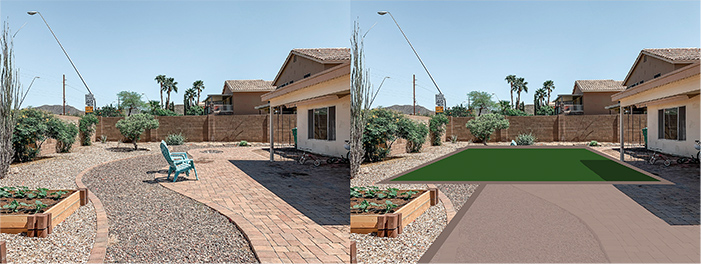
Before you start:
When measuring your area, keep in mind that grass is sold by the square foot, and generally comes on 100-foot rolls. These rolls are available in 15 or 7.5-foot widths. We can cut any length of grass up to 100’ in increments of feet, but cannot cut to width.
Synthetic grass is directional, meaning the blades angle slightly in one direction. If your yard requires more than one piece of turf, it is important to keep the grain going in the same direction. Otherwise, you will have noticeable seams and it will appear to be mismatched.
We recommend sketching out your area and taking good measurements. Take measurements based on turf being directional. You can also bring your drawing to any of our stores or email the diagram to us and we can advise the amount of turf required to complete the install. Waste factor on most projects is around 20%, putting greens around 25%.

Measuring a rectangular area:
For rectangle or square shapes, you will measure at the widest point for both the width and the length. In the diagram shown, the area is 13’ wide by 20’ in length. In this instance, because we can only cut the length and not the width, you will be ordering a 15’ x 20’ piece of grass - 300 sq. ft.

Measuring l-shaped sections
For L-shaped areas, keep in mind that the grass blades are directional so you will be ordering at least 2 pieces. In the diagram shown, there are two areas to measure: piece 1 is 9’ wide on the left edge, 15‘ wide on the right edge, and 20’ long. In this instance, because we can only cut the length and not the width, you will be ordering a 15’ x 20‘ piece and a 15’ by 6’ piece.

Measuring a non-standard shape
For non-standard shapes, you will measure at the widest point for both the width and the length. For instance, in the diagram shown, the area is 15’ wide by 35’ in length. In this instance, because we can only cut the length and not the width, you will be ordering a 15’ x 35’ piece of grass - 525 sq. ft.
Tools Required
Some of the tools required for installing synthetic grass are fairly basic, but some installations might require more specialized equipment. At a minimum, you will need a razor knife and blades, tape measure, rake, and hammer.
Renting Specialized Tool
Power brooms, vibratory compactors, and sand spreaders can be rented from any Synthetic Grass Store location. Power brooming is recommended even on small jobs. This process powers the infill down into the grass fibers which helps the blades stay up and reduces matting.

Removing Natural Grass
If your job requires removing existing natural grass, you will need a pickax or gas-powered sod cutter, which can be rented at most home improvement stores. It is strongly recommended to remove at least 2 ½” of the existing grass and any root base. Vegetation killer can be used optionally to prevent weeds and vegetation from growing back.
Materials Required
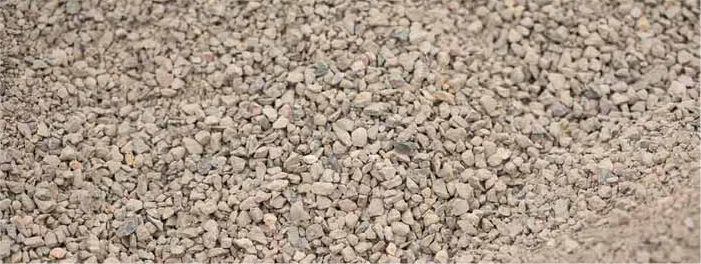
In addition to your turf, you will need enough quarter-inch minus aggregate to form a base that is 2” deep. Weed barrier fabric, nails, and infills such as sand, copper slag, or specialized infills are also required. All of these materials can be purchased from any Synthetic Grass Store location with the exception of the aggregate base. If you are unsure how much material you will need, our friendly staff can help you figure it out.

Setting Grade & Prep
To begin the project the area needs to be 2 ½” below grade, and free of any existing root base. When an existing lawn is present (even if dead or dormant) it is strongly recommended to remove at least 2 ½” of the existing grass. A sod cutter works best for large areas and can normally be rented from your local hardware or rental equipment store. In addition, you can use a vegetation killer if you want more protection, but it is not required.

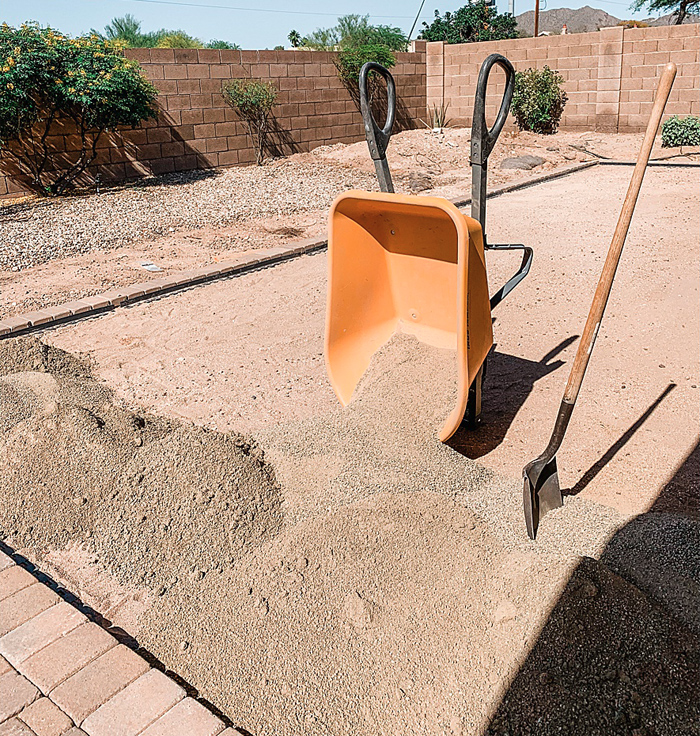
Spreading Aggregate
Spreading aggregate over the installation area is the first step in creating your sub-base for synthetic grass. It is recommended the base be at least 2” deep. Use an asphalt or landscape rake to spread aggregate evenly and level your base. Dampen the entire area with a garden hose. Compact the area using a hand tamper or plate compactor.
When complete, the sub-base should be a hard, smooth surface for the turf to lie over. The sub-base gives the turf a solid foundation while providing proper drainage. Common sub-base materials are ¼ minus or decomposed granite. Approximately 1 ton per 100 square feet is average. If your area is low, more bases may be required.


Laying the Weed Barrie
It is recommended to use a commercial-grade weed fabric to keep unwanted weeds or grass from growing up into your artificial turf.
Start by rolling the weed fabric over the entire sub-base, overlapping the edges by a couple of inches. Secure with nails along the edges every foot or so, but take care not to nail too hard or you will leave divots that will show in the turf. Nail the perimeter with the same spacing and you are ready for the next step.

Trim Excess Manufacturing Material
When turf is manufactured, an extra couple of inches of backing material remains along the edge of the turf. This extension runs the length of the turf roll on both sides after the last stitching row of yarn. Before you can seam two pieces of turf together you must remove the extra material. To trim the excess material, flip the turf over and work from the backside. Find the second row of stitching and start cutting between the second and third stitch row with a carpet knife. When your knife becomes dull, replace or rotate the blades to keep your cuts neat. Do not cut turf from the top as it will sever the grass blades.
After you have measured and marked your sections, roll the turf over the base and cut each section. It is a good idea to leave a little extra length while you position the turf. You will trim off the extra length once you have all the turf in position and are ready to cut the final shape. You will want to make sure that you roll out the turf in the same direction each time, as artificial grass is grain directional.
Cutting Around Rocks and Odd Shape
Start from the center of the rock and make small slits around it. You want to keep the turf right up to the rock’s edge and get the turf to lay flat on the ground without wrinkles. Make as many small cuts as necessary to achieve this. Remove any excess turf and work with smaller pieces. It is much easier to maneuver with small pieces of turf.
Seaming Two Turf Sections Together
Before cutting the turf to make your seams, always make sure the grain of the fibers is facing the same direction on both sections of turf. Be sure to cut between the rows of stitches, not on the stitches.
Position your two pieces with the backing layers touching. Check and double-check the fit of the two sections making sure there is no overlap. Any overlapping of the two pieces will cause a bulge or wrinkle in the seam.

Secure Edges with Nail
Use nails to secure the turf edges at the seams and around the perimeter of the installation area. Tap nails 3-4 inches apart, for seams use a zigzag pattern about an inch from the edges. Avoid hitting the nails too hard, as this can create divots in the turf.
It is important to use nails that are 3” - 6” in length to properly secure the grass to your base. We recommend electro galvanized or steel nails, as you want the nails to rust, allowing them to expand and hold the turf more securely into the sub-base. Nails work in combination with infill to keep the turf securely in place.

Why Do I Need Infill?
Infill serves to weigh down your turf to prevent it from moving and keeps the grass blades standing erect. Popular options include silica sand, copper slag, and other natural materials. Approximately 2 to 2-1/2 pounds of infill is standard for most applications. The higher the face weight of the turf, the more infill you will use.
Using a Drop Spreader for Sand Infill
The drop spreader is used to evenly disperse sand infill into the turf fibers. Fill your drop spreader with sand and start at one corner of your lawn just like spreading fertilizer on natural grass. Walk-behind the spreader at a steady pace dropping a measured amount around the perimeter a couple of times. You can either continue walking in a circle until you reach the middle or start spreading using up and down passes. The key is to spread the sand as evenly as possible. It is recommended that you lay down half of your infill, power broom it, and then lay down the second half, again followed by a final power brooming.

Finish Infill Process with Final Brooming
Brooming can be done with a stiff-bristled brush/broom or a power broom. Start from one end making smooth strokes against the grain over the entire area. Look closely at all areas, if necessary add infill with a drop spreader where it is needed and work those areas in with your broom.
